Sunday, 16 January 2011

Interfacing


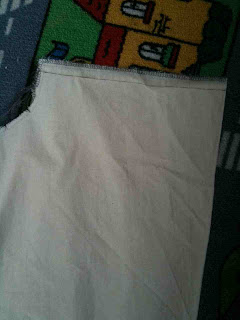
During my pattern cutting lesson I learnt about 3 types of interfacing, light, medium and heavy.

Light and medium interfacing is used for cuffs, collars, facings, waistbands and button stands whilst heavy interfacing is used for stronger, structured garments.


Light/ medium interfacing on a collar.


Heavy interfacing is used on this dress to maintain the structure and shape.

Skirt Facing


Last Tuesday during my pattern cutting lesson I made a skirt facing. At first I did not know what a skirt facing was. I thought it looked like a waistband but it was not like a waistband at all. My tutor explained the difference between a facing and a waistband to all of us in the class. Facing is an option, instead of a waistband, to finish off raw edges around the waistline. Here is what I manufactured.

Outside

This is the finished skirt facing sample.


Inside

This shows what would the inside looks like.


Interfacing

The interfacing holds the shape of a garment and gives it structure.


Retaining row

The retaining row prevents the facing from rolling up. I sewed a machine line along the waistline, sewing the facing, interfacing and seam allowances together. I then pressed this flat, turned it inside the skirt and pressed it again.

Sunday, 9 January 2011

My final toile. (cowl skirt)

This images show the final outcome of the toile that I made with the waistband. The front of the skirt reminds me of a close rose bud upside down. I like the cowl skirt folds because it looks like a big pocket on both side of the skirt. The final outcome looked similar as the design that I've drawn in my sketchbook as I would have imagined it to be. The waistbnd looked perfect but on my design it actually has a layer of folded panel. I think that I've made it perfectly concidering that it was my first time making a cowl skirt and the pattern was really hard to make as well.


Front of the skirt.

Close up of the waistband

Back of the skirt

Close up of the back

Thursday, 6 January 2011

Producing my waistband


On this post I will show you how I made the waistband for my skirt toile.

This image shows the paper pattern that I made for my waistband.
I measured around the waist of my skirt then added 4cm. Then I decided that the width will be 10cm long. After that I added 1.5cm seam allowance. And then I doubled it up because I folding it.

This images shows the pattern being cut out of fabric. I didn't place the pattern on the grain line therefor it will stretch when I sew it in.


The next step that I did was to fold the fabric in half then iron it flat. I also folded the 1.5 seam allowance. Then I sewn in 1.5cm on each side of the waistband.


Then I reduced the bulk.


On this image the skirt got caught on the waistband when I was sewing it. So I unpicked it and made sure that the skirt wont get caught when I sew it again.


So that's how I made my waistband.


Wednesday, 5 January 2011

Hem


I've hand stitch the hem of my toile to give the couture effect.


Here I've hand sewn in the 1.5cm seam allowance for the hem.


Continuing with the toile


I've stitched the two sides of the skirt together and measured 1.5cm from the edge. This is going to be the cowl detail of the skirt. And then I've repeated the same on the other side.


Overlocking and adding the zip.


I've overlock the whole pattern and now I can add the zip.

back

front